Lightweight, Colorful, and Full of Impact
Tissue paper—delicate, inexpensive, and wonderfully versatile—can be transformed into stunning suspended decorations that elevate any space. Whether you’re planning a birthday party, wedding, baby shower, or simply refreshing your living room, hanging tissue paper decor brings energy, texture, and movement without breaking the bank.
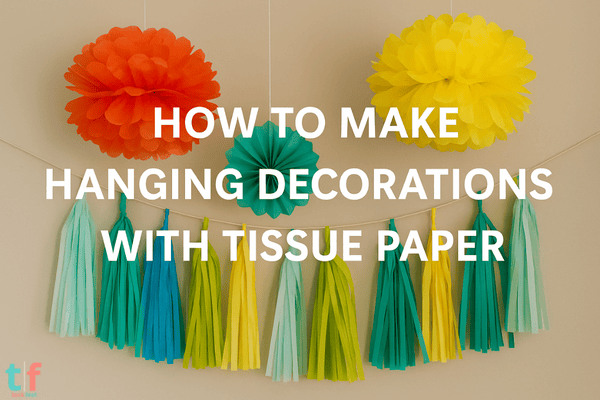
In this guide, you’ll discover how to create different types of tissue paper hanging decorations, from pom-poms and tassels to lanterns and garlands. These easy, eye-catching projects will fill your space with color and creativity.
Why Use Tissue Paper for Hanging Decor?
Budget-Friendly Brilliance
A single pack of tissue paper can go a long way. It’s affordable, widely available, and comes in every color imaginable.
Lightweight and Easy to Work With
Perfect for ceiling decor, tissue paper is light enough to hang safely with tape or string, and easy enough for all ages to work with.
Big Visual Payoff
The volume, layering, and movement of tissue paper make it perfect for transforming empty spaces into vibrant celebration zones.
Supplies You’ll Likely Need
- Tissue paper (multiple colors)
- Scissors
- String or ribbon
- Glue, double-sided tape, or stapler
- Fishing line or clear thread (for invisible hanging)
- Hole punch
- Optional: glitter, markers, paperclips, beads
Project 1: Tissue Paper Pom-Poms
Perfect for: Birthdays, baby showers, weddings
Instructions:
- Stack 8–12 sheets of tissue paper.
- Fold accordion-style in 1–1.5 inch sections.
- Tie the center with string.
- Trim the ends into rounded or pointed shapes.
- Gently pull each layer toward the center, fluffing as you go.
- Hang individually or in clusters at different heights.
🎈 Elegant yet playful—pom-poms never go out of style.
Project 2: Hanging Tissue Paper Tassels
Ideal for: Garlands, photo booth backdrops, or gift decor
How to Make:
- Fold a single sheet of tissue paper in half vertically.
- Cut thin strips from the open edge, leaving 1–2 inches uncut at the fold.
- Unfold and roll into a tube.
- Twist the middle and form a loop to tie with string.
- Repeat in multiple colors and string together.
🎊 Vibrant, festive, and great for adding motion to your decor.
Project 3: Tissue Paper Flower Fans
Best For: Spring-themed events, boho parties, or whimsical decor
Materials:
- Multiple sheets of tissue paper
- Stapler or glue
- String for hanging
Steps:
- Stack 5–7 sheets and accordion-fold.
- Staple or glue the center.
- Fan out each side to form a circle.
- Tape the ends together and attach a string.
🌸 You can layer colors for ombre effects or add glitter edges for sparkle.
Project 4: Honeycomb Tissue Orbs
For: Weddings, elegant celebrations, minimalistic designs
What You’ll Need:
- Precut tissue paper circles
- Glue or double-sided tape
- Cardboard template
How-To:
- Fold circles in half and glue sides together, alternating glue placement for honeycomb texture.
- Use 20+ circles for fuller orbs.
- Attach a string in the middle before closing the orb.
- Hang in groups or alone.
💫 These look stunning in windows or as floating centerpieces.
Project 5: Hanging Paper Lanterns with Fringe
Perfect for: Outdoor parties, summer events, or kids’ rooms
How to Make It:
- Cut tissue paper into 6×10 inch rectangles.
- Fold in half and cut fringe on the open edge.
- Roll into a cylinder and secure with glue or tape.
- Insert LED tea light or hang with string.
✨ Great for a warm, playful vibe when mixed with lights or garlands.
Project 6: Layered Tissue Paper Garlands
Use For: Party walls, table runners, staircases
Instructions:
- Cut long strips of tissue paper (2–4 inches wide).
- Layer multiple colors slightly offset.
- Sew or glue along the top edge to form a ribbon-like garland.
- Drape along ceilings, walls, or around tables.
🎉 Visually striking and easy to scale up for large spaces.
Extra Tips for Professional Results
- Use a consistent color palette for cohesive style.
- Mix textures: combine tissue with crepe paper or metallic fringe for depth.
- Hang at varying lengths to add visual movement and interest.
- Pair with lights—LED string lights behind tissue decor can create a magical glow.
- Don’t over-cluster: Let each piece have room to “breathe” visually.
Easy Hanging Techniques
- Command hooks or clear tape work well for lightweight paper items.
- Fishing line makes elements look like they’re floating.
- Attach to balloons, branches, or dowels for portable display options.
- Use curtain rods or tension rods for structured backdrops and arches.
From Flat Sheets to Floating Art
Tissue paper decorations are proof that you don’t need expensive materials to create something memorable. With just a few folds, cuts, and strings, you can turn a flat sheet into a floating sculpture that transforms any room or event.
So grab a stack of tissue paper, pick your colors, and let the creativity unfold—literally.
👉 If this guide gave you some ideas, share it with friends, party planners, or craft lovers. Let’s fill the world with more lightweight beauty, one pom-pom at a time! 💫

Chloe Turner is a specialist in event planning and decoration, focusing on providing creative, practical, and budget-friendly solutions for parties. On TockFest.com, she shares the latest trends, tips, and innovations to help readers turn any celebration into a memorable experience. Chloe is dedicated to offering up-to-date and relevant content, ensuring that her audience has access to the best practices and ideas for creating beautiful, unique parties.