Light, Texture, and Magic in Every Detail
There’s something deeply enchanting about soft lighting. Whether you’re planning a cozy dinner, decorating for a wedding, or adding ambiance to your living room, decorative lanterns and domes bring warmth and charm to any space. Best of all, you don’t need to buy expensive lighting décor—you can create your own stunning pieces using simple materials and a little creativity.
In this article, we’ll explore how to make DIY domes and lanterns that suit any occasion or space, using paper, glass, wire, and fabric. These projects blend aesthetic appeal with functionality and are accessible even if you’re new to crafting.
Why Make Your Own Lanterns and Domes?
Cost-Effective Elegance
Store-bought decorative lights and domes can be surprisingly expensive. DIY versions allow you to achieve the same (or better!) effect at a fraction of the cost.
Customization
Choose colors, patterns, textures, and lighting styles that reflect your taste or match the theme of your event.
Mindful, Hands-On Creation
Crafting your own lighting pieces lets you slow down, get creative, and enjoy the satisfaction of making something beautiful with your own hands.
Materials You Might Need
Depending on the style you’re going for, gather some of the following:
- Glass jars, bowls, or cloches
- Balloon, string, and glue (for string domes)
- Paper (rice paper, cardstock, parchment, kraft)
- Fabric (sheer, lace, or tulle)
- Metal wire or coat hangers
- LED tea lights or fairy lights
- Scissors, glue gun, double-sided tape
- Wooden bases, cork boards, or recycled materials
- Decorative accents: flowers, beads, ribbons, paint
Project 1: Twine String Dome with LED Light
Perfect for: Rustic weddings, cozy interiors, centerpieces
What You’ll Need:
- Balloon (round or oval shape)
- Twine or natural string
- White glue mixed with water (1:1 ratio)
- LED tea light or string light
- Small wooden base (optional)
Instructions:
- Inflate the balloon to your desired size.
- Dip string into the glue mix and wrap randomly around the balloon.
- Let it dry completely (12–24 hours).
- Pop the balloon and gently remove it from inside.
- Place LED light inside or underneath.
- Optionally, mount on a wooden base or hang from the ceiling.
🌾 Delicate, earthy, and full of texture.
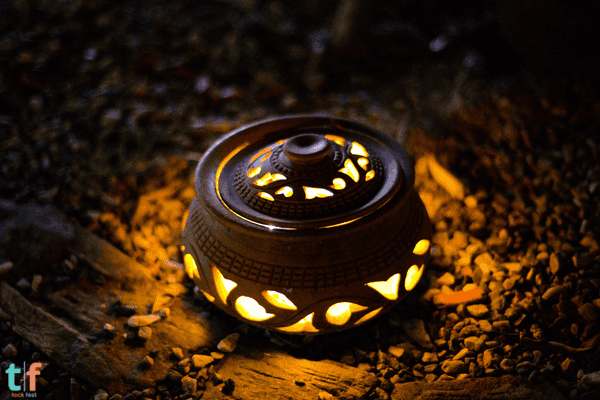
Project 2: Paper Lantern with Cut-Out Designs
Perfect for: Indoor parties, dinner tables, or romantic settings
What You’ll Need:
- Cardstock or parchment paper
- Craft knife or scissors
- Double-sided tape or glue
- Battery-powered candle or fairy lights
How to Make It:
- Cut the paper to your preferred size (A4 is a good start).
- Create patterns using a craft knife: stars, flowers, hearts, geometric shapes.
- Curve the paper into a cylinder and secure with tape or glue.
- Insert LED light inside.
✨ Creates mesmerizing light patterns on nearby surfaces.
Project 3: Glass Jar Lanterns with Fabric or Lace
Ideal for: Bedrooms, patios, or wedding receptions
Materials:
- Clean glass jars (mason jars, recycled jars)
- Sheer fabric or lace
- Mod Podge or diluted white glue
- Ribbon or twine
- LED tea lights
Steps:
- Apply glue to the outside of the jar and wrap with fabric or lace.
- Smooth out any bubbles or creases.
- Let it dry, then add ribbon or twine to the rim.
- Place an LED candle inside for a soft glow.
🕯️ Elegant and dreamy with minimal effort.
Project 4: Metal Wire Lantern Frame with Fabric Panels
Perfect for: Boho decor, garden parties, or home accents
What You’ll Need:
- Craft wire or metal hangers
- Wire cutters and pliers
- Sheer fabric (tulle, organza)
- Glue gun or sewing kit
- LED lights or fairy string lights
Assembly:
- Bend wire into a cube, cylinder, or dome shape.
- Wrap fabric around the frame and glue or stitch in place.
- Add lights inside the frame.
- Suspend from the ceiling or place on a table.
🌙 Soft structure meets ethereal light—perfect for outdoor nights.
Project 5: Upside-Down Bowl Light Dome
Best for: Minimalist or Scandinavian-style interiors
You’ll Need:
- Clear or frosted glass bowl
- Wooden base or tray
- LED puck light or small string light
- Optional: paint or etching cream
Instructions:
- Decorate the bowl if desired (etching, painting, decoupage).
- Place the LED light on the base.
- Cover with the bowl to create a soft, dome-like lamp.
💡 Simple and effective ambient lighting for shelves or desks.
Styling Ideas and Tips
- Use warm white lights for a cozy, relaxing mood.
- Add dried flowers, pinecones, or crystals around the base for seasonal touches.
- Hang lanterns at varying heights for visual interest.
- Mix textures: metal, wood, fabric, glass, and paper to create contrast.
- Use remote-controlled LEDs for convenience and safety.
Safety First!
- Always use battery-operated lights, especially when working with paper or fabric.
- Avoid placing lanterns near flammable items or water sources.
- Check that your lights are cool to the touch before sealing them into enclosed spaces.
Let There Be Light… Your Way
Making your own decorative domes and lanterns is more than just a craft project—it’s a way to shape mood, memory, and emotion through design. These lighting pieces become part of your space’s story, reflecting the time and care you put into them.
👉 If this article lit a spark in your imagination, share it with friends, fellow DIYers, or event planners! You don’t need expensive chandeliers to make something shine—sometimes, a handmade glow is the brightest of all. ✨

Chloe Turner is a specialist in event planning and decoration, focusing on providing creative, practical, and budget-friendly solutions for parties. On TockFest.com, she shares the latest trends, tips, and innovations to help readers turn any celebration into a memorable experience. Chloe is dedicated to offering up-to-date and relevant content, ensuring that her audience has access to the best practices and ideas for creating beautiful, unique parties.