Cake toppers are the little details that can transform the entire look of your main table. Whether it’s for a birthday, wedding, or themed party, a personalized cake topper adds charm, creativity, and a unique flair to your celebration. If you love DIY projects, creating your own custom cake topper is a fantastic way to showcase your personal style.
Hook: “Learn how to create one-of-a-kind cake toppers that perfectly match your party theme and showcase your creative touch!”
Basic Materials for Handmade Cake Toppers
Creating a custom cake topper is easy with the right materials. Here’s a list of everything you need to get started:
- Cardstock, Photographic Paper, or Glossy Paper: Perfect for printing your design and creating sturdy, lasting toppers.
- Wooden Skewers, Decorative Straws, or Acrylic Sticks: To mount your topper and add stability.
- Scissors, Craft Knife: For cutting out your designs carefully.
- Hot Glue: To secure elements in place.
- Ribbons, Mini Pom Poms, Glitter, EVA Foam: For adding fun textures and extra detail.
- Free Design Software (Canva, PowerPoint) or pre-made printable designs: Use online tools to create or find designs that match your theme.
Types of Customized Cake Toppers
There are many different styles for cake toppers, depending on the theme of your party. Here are some popular ideas:
- Name + Age: The classic topper with the name and age of the celebrant.
- Mini Themed Characters: Create cute mini versions of characters from movies, TV shows, or video games (think Funko Pop style).
- Topper with Banners and Phrases: Add a touch of fun with phrases like “Happy Birthday,” “It’s a Girl,” or “Cheers!”
- Minimalist: Simple and elegant typography for a clean, modern look.
- 3D with Paper Layers or EVA Elements: Build layers to give your topper depth and a more dynamic appearance.
Step-by-Step: How to Create a Handmade Cake Topper
Creating your own topper is easier than it seems. Just follow these simple steps:
Step 1: Choose the Theme and Style
Start by deciding the theme of your party and ensuring your cake topper fits into that theme. Whether it’s a kids’ party, a wedding, a gender reveal, or a teen birthday, your topper should match the overall vibe of the event.
Theme Suggestions:
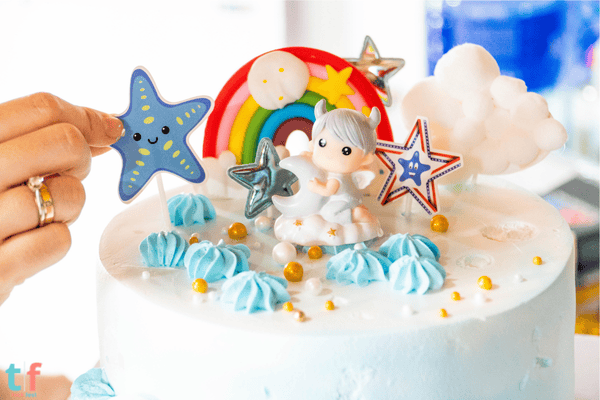
- Kids’ Party: Bright colors and fun characters.
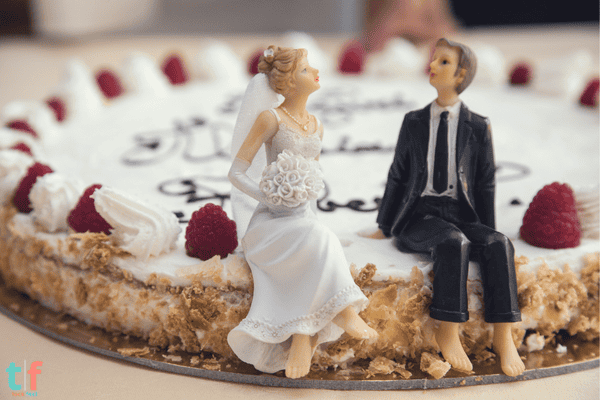
- Wedding: Elegant typography with a romantic feel.
- Gender Reveal: Cute phrases like “It’s a Boy!” or “Team Pink.”
- Teen Party: Trendy phrases or minimalistic designs.
- Adult Party: Sophisticated typography and clean lines.
Step 2: Create or Choose the Design
Once you’ve selected your theme, it’s time to create your topper design. You can either use online tools like Canva or PowerPoint to design your topper from scratch, or you can search for pre-made designs to print.
Design Tips:
- Choose fonts that are easy to read and match the mood of your event.
- Pick colors that complement the cake and the overall decoration.
- Use icons or illustrations that match your theme (e.g., flowers for weddings, stars for a space theme).
Step 3: Assemble the Topper
After printing your design, it’s time to assemble the topper:
- Cut out the design carefully with scissors or a craft knife.
- Layer the pieces: For a 3D effect, you can layer elements using cardboard, EVA foam, or thicker cardstock.
- Fix the sticks: Attach wooden skewers, acrylic sticks, or decorative straws to the back of your topper using hot glue or double-sided tape.
Step 4: Add Decorative Elements
Now for the fun part — add extra decorative elements to make your topper stand out:
- Glitter: Add a little sparkle for a glamorous touch.
- Mini Pom Poms: Use these for a fun, whimsical look.
- Ribbons: Tie ribbons around the sticks for an elegant finish.
Creative Ideas for Different Party Styles
Here are some ideas for cake toppers to fit various party styles:
- Rustic: Use jute and kraft paper for a natural, cozy vibe.
- Luxurious: Incorporate gold, silver, and glitter for an upscale look.
- Geeky: Create toppers inspired by movies, TV shows, or video games.
- Instagram-worthy: Choose trendy phrases or use Tumblr-style aesthetics with pastel colors and minimal designs.
Extra Personalization Tips
- Add Shine: Use sequins or rhinestones to add a touch of glam.
- Use Photos: Personalize with the birthday person’s photo for an extra sentimental touch.
- Create a Kit: Make matching smaller toppers or wrappers to complement the main cake topper for a coordinated look.
Common Mistakes to Avoid
When creating your cake topper, keep these common mistakes in mind:
- Using Too Thin Paper: Thin paper may bend or warp easily. Opt for sturdier materials like thick cardstock or MDF.
- Hard-to-Read Fonts: Avoid overly decorative fonts that are difficult to read from a distance.
- Proportions: Make sure the topper is proportional to the size of the cake. A topper that’s too large can overpower the cake, while a small one might get lost.
- Lack of Harmony: Ensure your topper complements the rest of the decor. Don’t mix too many styles that clash.
Sustainability: Reusable or Eco-Friendly Options
If you want to create a more sustainable cake topper, consider these options:
- MDF or Acrylic: These materials are durable and reusable. You can create toppers with removable names or messages for future use.
- Recycled Paper: Use recycled paper for your design to minimize waste.
- Reusable Ribbons and Tapes: Choose ribbons or materials that can be used again for other events.
Conclusion
Creating your own handmade cake topper is easier than you think, and it can make a huge difference in the overall presentation of your party. Whether you’re hosting a wedding, birthday, or intimate gathering, a personalized cake topper adds that special touch that guests will remember. Best of all, it’s a budget-friendly way to add a lot of creativity and personality to your celebration.
Encouragement: “Your personal touch is the secret ingredient that makes your party truly unique!”
👉 If you loved these DIY cake topper ideas, share them with your friends on social media and inspire others to create their own custom toppers!
💬 Tell us: What design would you choose for your next cake topper? Share your ideas in the comments — we’d love to see your creativity in action!

Chloe Turner is a specialist in event planning and decoration, focusing on providing creative, practical, and budget-friendly solutions for parties. On TockFest.com, she shares the latest trends, tips, and innovations to help readers turn any celebration into a memorable experience. Chloe is dedicated to offering up-to-date and relevant content, ensuring that her audience has access to the best practices and ideas for creating beautiful, unique parties.