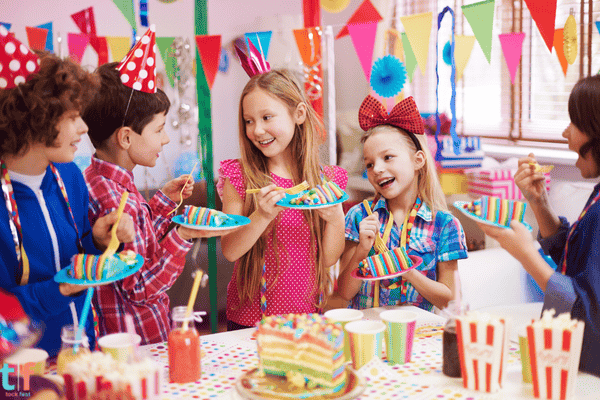
The party panel is the “visual heart” of any celebration. It’s not just a decorative element—it’s the photo backdrop, the focal point that pulls everything together. Whether it’s to highlight the birthday child’s name, the party theme, or just add some magic to the event, a personalized panel instantly elevates the atmosphere.
Customization is a growing trend, with parents incorporating everything from the child’s name to their favorite theme. This article will guide you through the process of choosing, designing, and crafting your very own personalized panel, offering creative ideas and tips on materials, step-by-step instructions, and more.
Choosing the Theme and Style of the Panel
The theme of the party plays a huge role in the design of the panel. Here’s how you can tailor the panel to fit your celebration:
How the Party Theme Influences the Panel Design
The theme determines the shapes, colors, and elements you’ll use for the panel. For instance, a princess party will have elegant details like crowns and castles, while a superhero party will have bold colors and dynamic shapes. Aligning the panel style with the party theme ensures everything matches and looks cohesive.
Popular Styles:
- Classic: Bold colors, simple design, and lots of character-themed elements.
- Minimalist: Clean lines, neutral tones, and a sleek look.
- Colorful: Bright, playful colors for a cheerful, dynamic vibe.
- 3D: Interactive, layered designs that add dimension to the display.
- Rustic: Earthy tones and natural textures, ideal for farm or nature-themed parties.
- Character-themed: Panels featuring popular characters like Mickey, Minnie, or superheroes.
Most Common Panel Types
Depending on your time, budget, and aesthetic preference, there are several types of panels you can create. Let’s take a look at the most common options:
Fabric or TNT Panel
Fabric is a classic choice for a soft, elegant look. You can choose from a variety of colors and textures to fit your theme. TNT (non-woven fabric) is a cost-effective alternative that works well for temporary use.
Cardboard + EVA Panel
Cardboard is a versatile and affordable material, while EVA foam adds dimension and vibrancy to the panel. Combine these two materials for a lightweight and durable option.
Balloon Panel (Organic or Molded)
For a bold statement, use balloons to create the panel. Organic balloon arrangements are trendy and give a soft, flowing look, while molded balloon panels provide structure and defined shapes.
MDF Panel with Paint or Stickers
MDF offers a sturdy base for your panel, and it’s perfect for adding detailed paint designs or stickers. This option is great if you’re looking for something durable and polished.
Digital Printed Panel
For those looking for convenience, a digital printed panel is ready-made and can be personalized with any design. This option is ideal for busy planners or those who prefer a professional look without the hassle of DIY.
Essential Materials (Budget-Friendly List)
Creating a custom panel doesn’t have to break the bank. Here’s a list of materials you’ll need:
Basic Materials:
- Cardboard or Styrofoam/MDF Sheets: Affordable, sturdy base materials.
- Colored EVA, Cartolina, Crepe Paper: For vibrant details and shapes.
- Hot Glue, Double-Sided Tape, Scissors, Utility Knife: Essential tools for assembling the panel.
Decorative Items:
- Ribbons, Flowers, Figures, Glitter, LED Lighting: Add these details to make your panel shine. Ribbons and flowers are perfect for adding a delicate touch, while glitter and lights bring the magic to life.
Step-by-Step to Create a Personalized Panel
Follow these easy steps to craft your own stunning panel:
Step 1: Define the Size and Location
Choose the space where the panel will be placed. Measure the area to ensure the panel fits and is visible to all guests. Consider factors like lighting and photo angles.
Step 2: Choose the Background
Select the material for the background. Options include fabric, paper, balloons, or even a printed image. For a dynamic look, use different textures or layer materials.
Step 3: Cut Letters, Shapes, and Characters
Using your chosen materials, cut out the shapes and characters. For example, if the theme is “under the sea,” cut out fish or coral shapes. Use stencils for neat edges.
Step 4: Assemble the Structure
Mount your design on a sturdy base. This could be a wooden frame, wire structure, or simply a wall if you’re using adhesive backing.
Step 5: Add Final Details
Finish by adding the child’s name, age, decorations, and any small touches like fairy lights or bows. Make sure everything is securely attached for safety.
Tips for Making the Panel Instagrammable
Want your panel to look great on social media? Here are some tips for making it Instagram-worthy:
Use LED Lights or String Lights
Lights give your panel a magical glow and help it stand out in photos. Opt for battery-powered LED string lights or fairy lights to add extra sparkle.
Combine with a Curtain or Balloon Backdrop
Enhance the panel by pairing it with a curtain or a balloon wall for a rich, multi-dimensional backdrop. This will add depth and make the panel pop.
Create Harmony with the Cake Table
Coordinate the panel’s design with the cake table, so everything feels cohesive. This could mean matching colors or adding similar decorations to both spaces.
Use Photo Frames for a Fun Touch
Add photo frames around the panel or place one in front for guests to take pictures. It’s a fun way to interact with the theme and makes for great photos!
Theme Inspirations
Here are some fun theme ideas to inspire your personalized panel design:
1st Birthday: Animals, Circus, Enchanted Garden
- Animals: Cute animal faces or a jungle backdrop.
- Circus: Colorful stripes and tents.
- Enchanted Garden: Floral patterns and fairy lights.
Girls: Princesses, Unicorns, Minnie Mouse
- Princesses: Castles and crowns with soft pastel tones.
- Unicorns: Rainbows and sparkles.
- Minnie Mouse: Classic red, yellow, and black with Mickey ears.
Boys: Cars, Superheroes, Farm
- Cars: Racing checkered flags and road signs.
- Superheroes: Comic-style explosions and action poses.
- Farm: Barns, animals, and rustic details.
Unisex: Rainbow, Safari, Pastel Colors
- Rainbow: Vibrant colors and clouds.
- Safari: Animal silhouettes and leafy greenery.
- Pastel: Soft tones with minimal decor for an elegant look.
Reusable and Sustainable Panels
Want to be eco-friendly? Consider using recyclable materials and making panels that can be reused for future parties:
Recycled Materials:
Use leftover cardboard, fabric scraps, or even old posters for your panel. These can be transformed into something beautiful with a little creativity.
Neutral Panels:
Create a neutral panel that can be customized for different themes. For example, a simple cloud or star-shaped design can be easily adapted by adding different colored elements or characters.
Disassemble and Store:
After the party, disassemble the panel carefully and store the materials for future use. This way, you can reuse elements for the next celebration.
Where to Buy Cheap Materials
Here are some places to find affordable materials for your panel:
Local Craft Stores:
Check local craft stores for inexpensive supplies like cardboard, paint, and glue. You can also find seasonal decorations during holidays at a discounted price.
Online Stores:
Websites like Amazon, Mercado Livre, and AliExpress offer a wide range of affordable craft supplies. You can even find pre-cut shapes or ready-made decor elements.
Recycling at Home:
Don’t forget about the items you already have at home. Old boxes, magazines, and leftover fabric can be used creatively in your designs.
Conclusion
Creating a personalized party panel is easier and more fun than you might think! It’s a great way to stimulate creativity, stay within your budget, and make your child’s celebration feel unique and special.
Did you love the step-by-step guide? Save this article for your next party and share it with other creative moms!

Chloe Turner is a specialist in event planning and decoration, focusing on providing creative, practical, and budget-friendly solutions for parties. On TockFest.com, she shares the latest trends, tips, and innovations to help readers turn any celebration into a memorable experience. Chloe is dedicated to offering up-to-date and relevant content, ensuring that her audience has access to the best practices and ideas for creating beautiful, unique parties.
