Curtains and room dividers play an essential role in any home, not only providing privacy but also helping to define spaces and add style to rooms. Whether you’re looking to create a cozy, private corner in a shared space or want to add a decorative touch to a window, these elements can completely transform a room. However, decorating with high-end curtains or dividers can be expensive. The good news is that you don’t have to spend a lot to achieve the look you want. With a little creativity and some affordable materials, you can make beautiful, personalized curtains and dividers that fit your style and budget.
In this article, you’ll learn how to create your own curtains and dividers using inexpensive materials and simple techniques. From fabric choices to unique customization ideas, you’ll discover how easy and affordable it is to bring your vision to life. Whether you’re aiming for a rustic look, modern minimalism, or something boho-chic, this DIY guide will provide all the tips and tricks you need to get started.
Let’s explore how you can use inexpensive materials to create stylish curtains and dividers that will add both functionality and flair to your home.
Materials Needed
Creating your own curtains and dividers doesn’t require a huge budget. With the right materials, you can craft beautiful pieces without breaking the bank. Here’s a list of the basic materials you’ll need:
Basic Materials:
- Cheap Fabric: You can use cotton, linen, or even repurpose old sheets. Look for fabric that matches the aesthetic you’re going for.
- Curtain Rod or Pole: A simple curtain rod or even a DIY pole made from a wooden dowel can work well.
- Measuring Tape: To measure the right length and width for your curtains or divider.
- Hot Glue Gun or Sewing Kit: For attaching fabric, rings, or other embellishments.
- Rings or Clips: These are necessary for hanging the fabric on a curtain rod. You can even use ribbons or cord to make a no-sew alternative.
Extra Materials for Customization:
- Cord or Rope: For creating simple, rustic room dividers.
- Lace, Fringe, or Ribbon: To add decorative details to your curtains.
- Bamboo or Wooden Sticks: Perfect for a natural, boho-inspired divider.
- Decorative Buttons or Flowers: To personalize the fabric with little details.
Where to Find Materials Economically:
- Fabric Stores: Look for sales or discounted remnants of fabric.
- Home Décor Stores: Often sell affordable curtain rods and accessories.
- Thrift Stores: Recycled or old sheets and curtains can be repurposed into something new.
- Craft Stores: They often have a variety of affordable embellishments like lace, buttons, and yarn.
With these materials, you’ll be ready to start your DIY project. Let’s take a look at how to go about making your own curtains and dividers!
Step-by-Step Guide to Making Decorative Curtains and Room Dividers
Step 1: Planning and Choosing the Style
Before you start cutting or gluing anything, it’s important to plan your design. Consider the space where you’ll be using the curtains or divider.
- Space Consideration: Will this be for a bedroom, living room, or office? Your choice of material and style will be influenced by the function. For a cozy bedroom, soft fabric like cotton or linen would work well. For a modern or industrial space, consider using bamboo or a metal rod.
- Style Selection: The style you choose will also dictate your fabric choice and additional decor. Whether you go for a minimalist, modern, rustic, or boho style, it’s important to align the materials and colors accordingly. For example:
- Rustic: Use jute or burlap.
- Minimalist: Opt for neutral-colored fabrics like white, beige, or gray.
- Boho: Layer fabrics and add decorative fringe or beads.
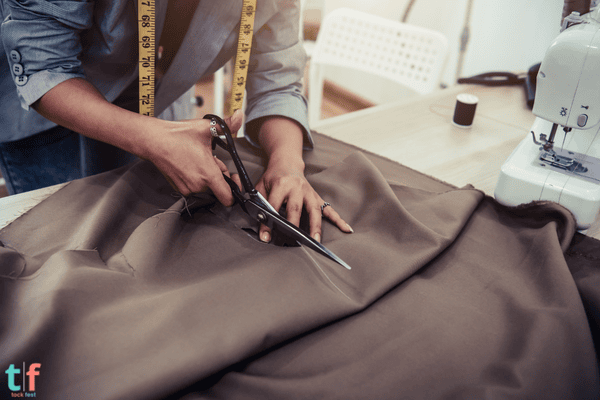
Step 2: Measuring and Cutting the Fabric
To ensure your curtains or divider fit perfectly, take accurate measurements.
- Measure the Area: Measure the width and height of the window or space where you want the curtains or divider to go. Make sure you account for any desired hanging space or extra fabric for gathering.
- Cutting the Fabric: Cut the fabric to the measurements, leaving extra for hems. If you’re making a divider, measure the length and width of the space it will cover, whether it’s a full-length divider or a shorter partition.
Step 3: Assembling the Curtain or Divider
Now it’s time to assemble your curtain or divider. Here’s how to proceed:
- Simple Fabric Curtains:
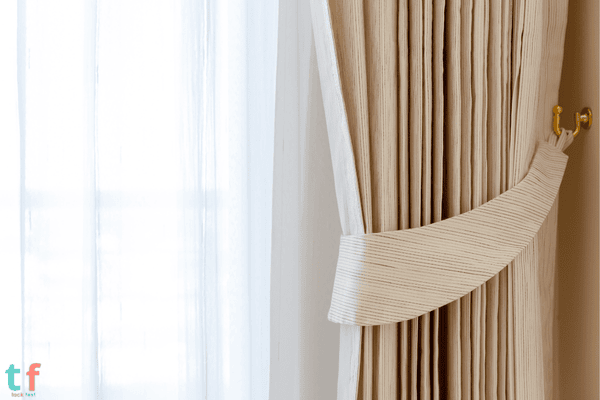
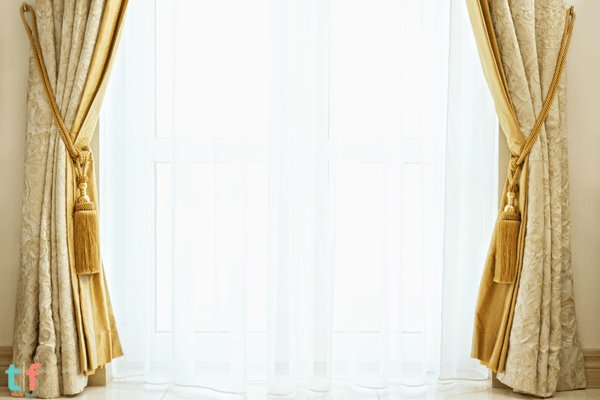
- No-Sew Method: Attach rings to the top of the fabric using hot glue or sew the fabric’s edges to create a hem. Thread a simple rope or string through the fabric to create a “tie-back” effect for added charm.
- Sewing Method: If you’re using a sewing machine, sew the sides of the fabric for clean edges and add a pocket at the top to slide a curtain rod through. You can also use curtain rings with clips for an easy-to-change style.
- Room Dividers with Rope or Bamboo:
- Using Rope: Measure the length of the space and attach ropes or cords between two sturdy poles or walls to create a hanging divider. You can tie knots, add beads or tassels, and even intertwine colored string for a more textured look.
- Using Bamboo: Cut bamboo rods to the desired height and attach them to a curtain rod or use wall hooks to create a vertical divider. This is a great option for creating a zen or tropical-inspired room divider.
Step 4: Customizing and Decorating
The fun part of DIY is adding your own personal touch! Here are some ways to customize your curtains and dividers:
- Fringe or Lace: Attach lace or fringe to the bottom or sides of the curtains for a bohemian touch.
- Embroidery: Add simple embroidery designs like flowers or geometric patterns for a handmade feel.
- Buttons or Beads: Sew buttons, beads, or charms onto the fabric for extra decoration.
- Painting: You can also paint your fabric with fabric paint for unique designs or patterns.
Step 5: Installation and Display
Finally, it’s time to install your curtains or dividers!
- Curtains: Use curtain rods or hooks for easy installation. Make sure to secure the rod firmly to the wall or ceiling to ensure the curtains hang straight.
- Room Dividers: If you’re using ropes or bamboo, make sure they are hung securely with strong hooks or anchors. If using a curtain rod, simply slide the fabric onto the rod and mount it on the wall.
Tips for Customization
When it comes to personalization, there are endless options:
- Light Filtering: If you want soft lighting, choose translucent fabrics that will allow light to filter through.
- Themed Décor: For different rooms, use fabric or accessories that match the theme, such as boho fringes, tropical prints, or minimalist fabrics.
- Bespoke Touches: Add lace or crochet details to match a vintage or rustic theme, or use metallic accents for a more modern look.
Conclusion
Making your own curtains and room dividers is a great way to add personality and functionality to your space without spending a fortune. By using affordable materials and simple techniques, you can create beautiful, custom pieces that fit your unique style. The best part? You can do it yourself!
We encourage you to try out these DIY techniques and share your creations with us! What materials and styles will you experiment with? Let us know in the comments below or tag us on social media to show off your handmade curtains and dividers!
Chloe Turner is a specialist in event planning and decoration, focusing on providing creative, practical, and budget-friendly solutions for parties. On TockFest.com, she shares the latest trends, tips, and innovations to help readers turn any celebration into a memorable experience. Chloe is dedicated to offering up-to-date and relevant content, ensuring that her audience has access to the best practices and ideas for creating beautiful, unique parties.