Why Wreaths Are Always a Good Idea
There’s something timeless and heartwarming about a wreath hanging on a door or wall. It’s a visual invitation—a silent message that says, “You’re welcome here.” Wreaths can reflect seasons, celebrations, or simply your personality. From rustic fall vibes to delicate spring tones, they’re an easy way to transform a space with just a few thoughtful materials and a touch of creativity.
In this guide, we’ll explore how to craft unique wreaths for five different occasions using accessible materials and step-by-step instructions. Whether you’re a seasoned crafter or just starting, there’s something here for everyone.
Materials You’ll Likely Need
Before we dive into each theme, here’s a basic toolkit that works across most styles:
- A base (wire frame, foam ring, or grapevine wreath)
- Hot glue gun + glue sticks
- Florist wire and scissors
- Decorative ribbon (various colors and textures)
- Faux flowers, leaves, branches, berries
- Thematic add-ons (ornaments, shells, fabric, wood letters, etc.)
You’ll build from this base and tweak your materials depending on the vibe and theme you’re aiming for.
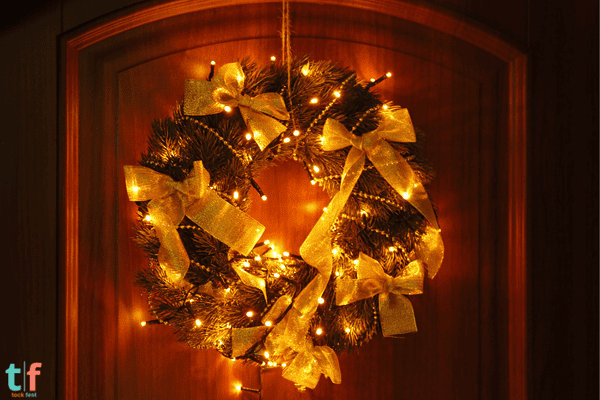
Christmas Wreath: Classic and Cozy
Nothing beats the warmth of a holiday wreath to kick off the festive season.
What You’ll Need:
- Pine branches (real or faux)
- Pinecones and small red berries
- Mini Christmas ornaments
- Red tartan or gold ribbon
- Optional: battery-powered string lights
How to Make It:
- Attach the pine branches to your frame using florist wire. Don’t aim for perfection—let it feel lush and natural.
- Layer in pinecones and berries to create texture. Use hot glue for sturdiness.
- Add ornaments, spaced evenly or clustered in sections.
- Finish with a statement bow at the bottom. Wrap string lights for extra magic.
✨ Pro tip: Spritz a cinnamon or pine essential oil spray to give it that “fresh tree” aroma.
Spring/Easter Wreath: Fresh and Delicate
Bring the garden indoors with soft tones and natural textures.
What You’ll Need:
- Faux tulips, daisies, or cherry blossoms
- Plastic or wooden pastel Easter eggs
- Spanish moss or preserved moss
- Light jute or lace ribbon
How to Make It:
- Start by covering the base in moss. Use glue generously—it acts as a cushion and anchor.
- Cluster faux eggs and floral bunches in asymmetrical segments for a modern look.
- Weave the jute ribbon between the flowers, letting it peek through gently.
- Add a small chalkboard sign with “Welcome Spring” or a bunny icon.
Fall/Thanksgiving Wreath: Rustic and Warm
Celebrate the harvest with earthy tones and cozy textures.
What You’ll Need:
- Dried leaves and eucalyptus
- Mini pumpkins (foam or felt)
- Burlap ribbon
- Acorns and cinnamon sticks
How to Make It:
- Wrap burlap ribbon around the frame like a garland.
- Layer leaves in one direction to create movement.
- Hot glue mini pumpkins and cinnamon sticks in small clusters.
- Accent with acorns and finish with a bow made of twine.
🧡 A great centerpiece above a fireplace or entryway.
Summer Wreath: Beachy and Bright
For that sun-soaked, carefree vibe.
What You’ll Need:
- Seashells and starfish
- Blue-and-white striped ribbon
- Rope, driftwood, or sand dollar accents
- Tropical faux flowers (hibiscus, frangipani)
How to Make It:
- Wrap your frame in nautical rope.
- Attach seashells and driftwood in alternating layers.
- Add bursts of tropical flowers for color.
- Tie the ribbon into a sailor-style knot for a playful detail.
🌊 Perfect for a beach house or summer patio.
Baby Shower Wreath: Soft and Personal
Welcome the new arrival with something sweet and handmade.
What You’ll Need:
- Tulle in pastel colors
- Mini baby shoes, rattles, or wooden letters
- Buttons or felt hearts
- Ribbon in baby pink, blue, yellow, or neutral tones
How to Make It:
- Tie strips of tulle around the frame until fully covered—it will look fluffy and soft.
- Attach themed elements like tiny bottles, rattles, or plush animals.
- Spell the baby’s name (or “It’s a Boy!” / “It’s a Girl!”) with painted wooden letters.
- Add finishing touches like bows or glittery accents.
🎀 Also works as a wall décor piece for the nursery afterward.
Tips for Better DIY Wreaths
- Balance your layout: Think of your wreath like a clock—decorating in “sections” can help maintain harmony.
- Test placement before gluing: Always lay out your design before committing with glue.
- Mix textures: Combine rough and smooth, soft and structured for visual interest.
- Don’t overdo it: Sometimes less is more. Let the base or negative space shine through.
One Last Thing…
Wreath-making is as much about the journey as the final product. Whether you’re using it as a mindful escape or gearing up for a party, crafting your own wreath adds a meaningful and personal touch to any space.
If you loved this tutorial, share it with your fellow DIYers and inspire others to bring a bit of charm into their homes too. 🌿✨

Chloe Turner is a specialist in event planning and decoration, focusing on providing creative, practical, and budget-friendly solutions for parties. On TockFest.com, she shares the latest trends, tips, and innovations to help readers turn any celebration into a memorable experience. Chloe is dedicated to offering up-to-date and relevant content, ensuring that her audience has access to the best practices and ideas for creating beautiful, unique parties.